At the onset of this project I had very high expectations. I always go into a video or short film knowing what I want the final product to look like, but often not realizing how unfeasible my desired result actually is. However, after finishing this project, I am happy to say the finished product is pretty close to my expectations. Some issues I have with the video include: frame rate issues (converting 60fps to 30fps turned out to be more difficult than anticipated), lighting inconstancies and issues (as even with 3 lighting kits shots came out very dark), actors not being able to hold certain positions still enough, and not having access to a track dolly system. Some accomplishments of mine however come in making up for the lack of certain pieces of equipment. The camera moves I was able to achieve with a wheeled dolly and in house stabilizer turned out to be quite effective. Continuity between shots also held up well.
All in all, I am very happy with the final product and look forward to potentially revisiting this concept in the near future.
IMM 412-01 Time Media VFX
Monday, April 30, 2012
Thursday, April 26, 2012
Production Log
some of the lighting kits used for the project |
motivating the actors to convey proper emotions |
The hardest part of this particular shot was making sure each actor could hold his pose extremely still. In order to sell the effect of stopped motion, the process used was fairly straightforward. I had each actor hold their pose as emotionally active as possible, but make sure not to move. Then, with very exact camera movements and the help of Andrew Kuserk and some 3D tracking programs 3D objects were added. I tried to make sure my narrative focused on objects that could easily convey frozen time.
As the shots continued forward, I had to be very exact about the path taken. In order to try to sell the effect of a single tracking shot, each individual take had to start and stop at corresponding points. This process proved to be quite difficult for several reasons:
one of the many takes we shot |
- maintaining the same lighting and color from shot to shot
- making sure the angle of the camera stayed consistent
- maintaining the same placement of objects from shot to shot
Erik's perfect reaction to the situation unfolding |
As the narrative moved into the hallway, we see two friends playing hockey, and it seems something went wrong. Though the physics of the shot are not realistic (as the glass would shatter out not in from the impact of a hockey puck) this shot proved to be the most difficult in post production.
Alyssa's addition to the scene sold the shot, however proved to be difficult in post |
Not only were the refractions of the added glass difficult for Andrew, but also the ability for the glass particles to move in front of the actress Alyssa.
the twitch effect used to stitch individual shots together |
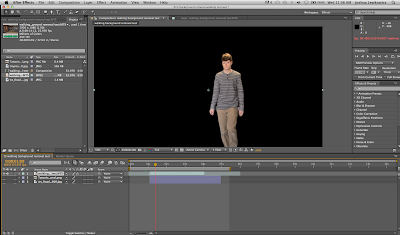
In order to have the glass particles move in front of Alyssa (rather than pass right over her since they are just a PNG image sequence with an alpha channel) she needed to be rotoscoped out of every frame. Rotoscoping is the process of painting pixels out of a shot frame by frame. The process is often used to remove wires from actors in post production or imperfections in a shot. In this case, Alyssa had to be "removed" from each frame the glass particles had to move around her. After abut 3 hours at 60fps, a mask was used instead as the rotobrush in after effects "wobbled" too much around the actress.
Moving down the hallway the shots begin to use an affect effects plugin called twitch, to stitch each shot together. This allowed imperfections like color and lighting differences between takes to be hidden.
the two individual takes, one darker in color |
the two individual takes, one lighter in color |
one of the best shots in the short, the frozen effect was sold quite well here |
The next shot features actor Ben S. and actress Sharmin frozen as the camera moves through the papers frozen in midair. This shot was on of the best in the short as the actors held incredibly still and the floating paper effect held up well.
The last shot of the short involves actor Ben L. breaking the frozen time effect and yelling into the camera shut up. This ending seemed logical and a quick way to break the action ensuing.
Time Freeze Final-Abstract/Storyboard/Concept
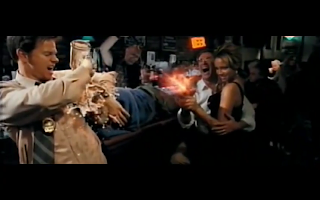
beer spilling and gunshot frozen in time |
frozen popcorn pieces |
I instantly wanted to delve into how this shot was created! I searched the web and found a few similar sequences that resembled this bullet time frozen effect. The first instance I stumbled on was a commercial Philips had produced about 3 years ago. The video followed a heist situation gone wrong, one tracking shot of an entire hospital complex...oh yeah, and everything was frozen in time. In order to achieve the amazing sequence, 3 different motion control rigs were used to keep shots consistent and exact. Then, two shots were filmed for each segment of the video,
one as a clean pallet at 24 fps, and then a second at 48 fps with actors in the shot so their slight movements would become less noticeable. Another technique used was to shoot the scene at an extremely high frame rate (about 750fps) so that the actors slight movements were not picked up in the final composition.
Realizing I had none of this equipment or capability, I looked to alternative ways to sell my shot. I knew I wanted a single tracking shot of a college freshman floor. The shot would have total chaos ensuing on the floor, and then end with one student trying to study and breaking the frozen shot when yelling at his floormates to shut up. However, achieving this shot proved to be difficult even before sitting down with my friend, Andrew Kuserk, for the 3D post production.
I started testing about two months before even starting production in order to see what type of camera I should use. After several failed attempts using a high speed point and shoot camera I own, I decided it would be best if I used a high definition camera at 60fps. Though the high speed camera could shoot at 220 fps it was just too low a resolution. After some testing with actors holding positions at 60fps and slowing that footage to 30 fps in after effects, I found a pretty good balance between semi high speed and quality. I also utilized the warp stabilizer in after effects as well as other tools to help clean up my footage. Next came production.
Thursday, March 15, 2012
Midterm Documentation
Proposal:
Utilize the tracking features of Adobe After Effects to track motion and objects. In order to test this I planned on using a tracking shot of my drum set and labeling each key element with 3D text. Then I would track this text to the motion of the shot so it appeared to be existing in 3D space.
Storyboard:
Production Log:
So this procedure was actually a lot more intensive than I expected. I first lit the drum set with two lights in order to try to balance out the light. Then I shot the kit with a side tracking dolly shot. However, the footage was a bit shaky because the dolly was moving on the thick carpet of my floor. So, in order to counteract this I added the warp stabilizer to the shot and it greatly improved the overall stability. Next, I tracked each element I wanted labeled on the kit with the text tracker and null objects. Then, I parented the text I wanted to each null object so it tracked along with the shot. Finally, I adjusted some of the automatic tracks manually and perfected the 3D properties of the text.
Self-Evaluation:
I was rather happy I figured out some of the unknown regions of After Effects because it is a truly powerful program to have under your belt. The most difficult parts of this project really came down to the manual adjustments of each track because of how long it took. However, with the knowledge I now I have, I really believe my Final is a realistic goal.
Utilize the tracking features of Adobe After Effects to track motion and objects. In order to test this I planned on using a tracking shot of my drum set and labeling each key element with 3D text. Then I would track this text to the motion of the shot so it appeared to be existing in 3D space.
Storyboard:
still of the original After Effects Workspace |
as the camera moves notice how the mid rack tom has shifted in perspective |
motion tracked null object parented to the first rack tom |
null object attached to the splash cymbal for tracking |
project layers, LABELS ARE IMPORTANT!!!! |
3D text manipulation |
Production Log:
So this procedure was actually a lot more intensive than I expected. I first lit the drum set with two lights in order to try to balance out the light. Then I shot the kit with a side tracking dolly shot. However, the footage was a bit shaky because the dolly was moving on the thick carpet of my floor. So, in order to counteract this I added the warp stabilizer to the shot and it greatly improved the overall stability. Next, I tracked each element I wanted labeled on the kit with the text tracker and null objects. Then, I parented the text I wanted to each null object so it tracked along with the shot. Finally, I adjusted some of the automatic tracks manually and perfected the 3D properties of the text.
Self-Evaluation:
I was rather happy I figured out some of the unknown regions of After Effects because it is a truly powerful program to have under your belt. The most difficult parts of this project really came down to the manual adjustments of each track because of how long it took. However, with the knowledge I now I have, I really believe my Final is a realistic goal.
Monday, March 5, 2012
Rotoscoping Fun in Adobe After Effects!
Hey all!! So doing my presentation on rotoscoping with the rotobrush in After Effects on Thursday I discovered another powerful use of the rotobrush. Using the cartoon effect on a rotoscoped clip of myself, I was able to save countless hours and achieve the same result as manually painting over another clip. Here are some screen shots showing this techniques results.
Wednesday, February 15, 2012
3D Composite and Rotoscope in After Effects
original shot of me walking in hallway, shot handheld and with very similar colors to subject in background (rotoscoping hell) |
using the rotobrush tool, I painted out my outline in every single frame (frame rate 24fps) |
without any background I brought the video into a composition |
I then added a background and scaled it based on the correct perspective |
Lastly, I added a new sky and rendered out the video |
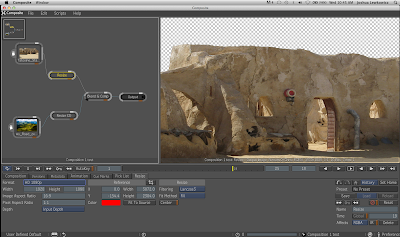
First 2D Composite in Composite
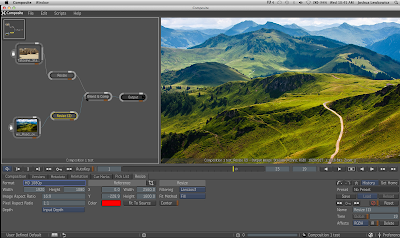
For the sky background I used a separate picture, and followed the same steps (minus photoshop) as with the foreground image. |
This was the final resulting 2D composite.
Subscribe to:
Posts (Atom)